The Fab Academy 2014
Digital Fabrication Laboratory. Department of Architecture.
Institute of Technology. EPS-CEU San Pablo CEU University
Adolfo Gutiérrez Sánchez
Architect
The Fab Academy 2014 Digital Fabrication Laboratory. Department of Architecture. Institute of Technology. EPS-CEU San Pablo CEU University |
Adolfo Gutiérrez Sánchez Architect |
|||
| Home | Portfolio | Files | ||
| COMPOSITES |
|
The assignment The assignment for this week was to build a mold large enough and then build the shape with a composite material. The idea is to build a piece that is going to be very resistant to compression and to flexion. A composite material is composed by two different materials: - Fiber.- the fiber will give resistance to flexion, it will resist all the tension in the longitudinal direction of the shape - Matrix.- this material, is usually liquid, reacts with a catalyst, and ensambles the whole structure of the composite and makes it solid. |
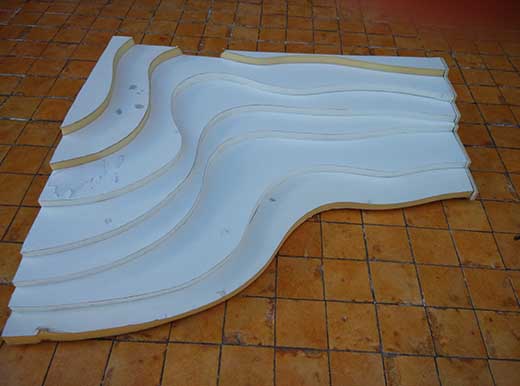
The mold design I had no idea what to do in this assignment, I had nothing to apply it for my final project and I did not have any good idea to design something usefull from the beggining. As the assignment caught me during the easter week, and my FabLab was closed, I made a mold of a topography, pretty simple but with some materials of spare models that I had on my own. The mold was made out of 1cm foamboard and it represented a toposurface from an architecture project.
|
|
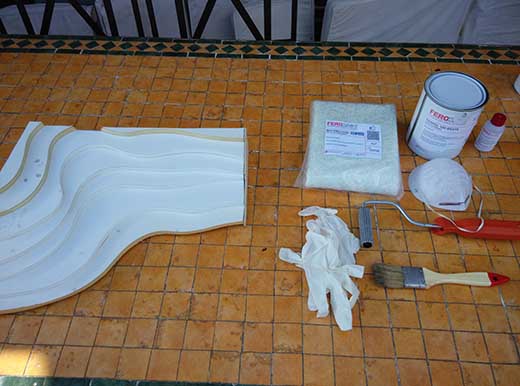
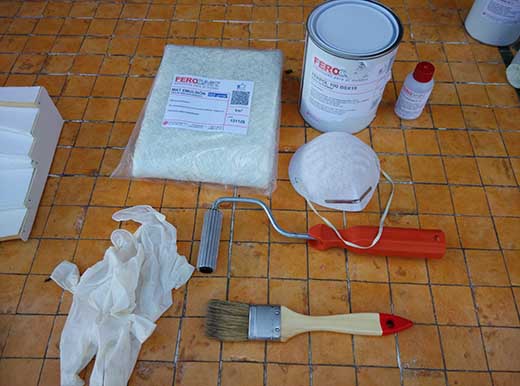
Preparing the materials and tools A very important thing before start doing the composites assignment, is to prepare perfectly all the materials that I will need during the work. Once we have all prepared, we have to know that some of the steps need to be done very fast as the resine will harden and it would mess my work. The necessary materials are listed below: - Glass fiber sheet - Polyester resine - Resine catalyst (1.5% proportion) - Metallic roller - Several brushes |
 |
|
Safety measures
Working with glass fiber and its resines it is VERY DANGEROUS, so it is very important to take some importante safety measures before starting to use the composites: - It is very important to use the composites kit in a well ventilated space, as much open as possible. Do not do this assignment in a tiny closed space. - Wear some long clothes. The glass fiber will spread all over the space and some tiny pieces might nail in your skin. - Wear gloves. The resine is very corrosive and may stick to your skin. The glass fiber might as well stick o your skin and it can be very annoying. - Wear a mask. The resine is very toxic, and the vapours may feel you dizzy. Even though you are using the mask, you may take some breaks when using this products.
|
Composites creation steps
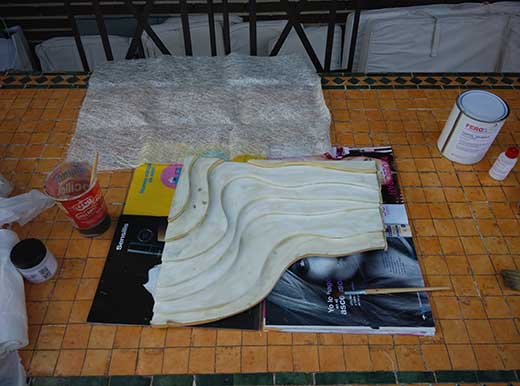
At this level, we can start doing the composites assignment. 1. First of all, is to prepare the piece on a plastic sheet or over some newspaper of magazines in order not to stain the table where you are working. I did not have any plastic sheet, so I had to use some spare magazines I had.
2. Second, and very important step, is to spread a lot of vaseline or a demolder component all along the mold. This step will allow you to demold the toposurface once the composite assignment is finished.
3. Apply one first layer of the resine component. First of all choose a recipient where to do the mixing of the resine and the catalyst. Do not mix the whole resine because we will apply several layers along the tutorial and we do not want to mess all the resine in the first step. *NOTE: It is important that we keep the same recipient and do not use all the brushes at the same step, because we will mess some of them in each single step
4. Done that, we will have to wait some time before applying the glass fiber as we need the resine to harden a little bit before applying it, but do not wait too much because we need the resine to be sticky. During the wait, we can crumble some of the fiber sheet in order to put some loose fibers in the corners of the model. As my model has several hard corners, it is useful that we spread some fibers along the corners in order to make a more defined model.
5. At this step, we can start apply some resine to those corners and to the rest of the model. This second layer will harden the fibers of the corners with the rest of the model. We will need to wait again the resine to harden but not too much in order to be sticky.
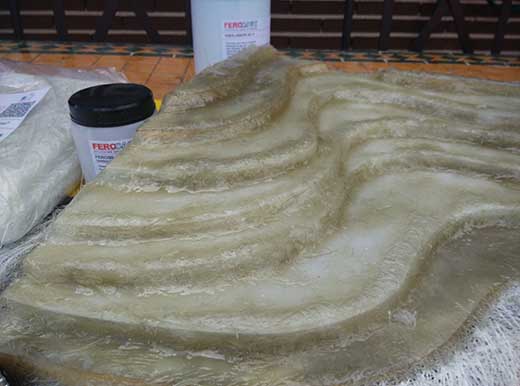
6. At this step we can apply a whole sheet of glass fiber to the whole model. We will need to do much more resine+catalyst as this step will need much more quantity. We will need to start the piece from the corners and from the center to the outside of the model. It is very important to apply some force when applying the resine so the sheet sticks to the model and do not move along the procedure.
7. Once we have finished we wil need to wait so the piece hardens totally. We will need to cut the extremes of the remaining glass fiber and demold the toposurface from the composite. *NOTE: I we did not apply the vaseline at the very beggining, this step will be much harder and the mold will be very difficult to separate the two pieces.
MIXTAKES IN MY MOLDING - The mold was not hard enough (it was made of foamboard), it is preferable to use a harder mold, made out of wood and a material that is less porous. - The glass fiber sheet was a little bit messy. For the next time I will try to use a different fiber to make the work easier. - The mold was very orthogonal, and the corners were difficult to make them perfectly. It is much more preferable to do it with a softer model.
|
|
 |
|
 |